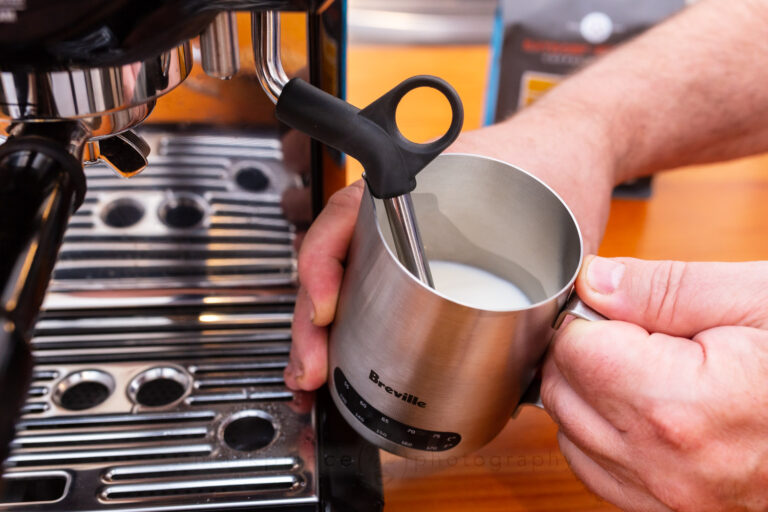
How to Steam Milk on the Breville Barista Express
Crafting the perfect cup of coffee at home is incredibly satisfying, and mastering the art of steaming milk is a key component. My journey with the Breville Barista Express started with many bubbly mistakes, but after some practice, I now consistently produce silky microfoam for lattes and cappuccinos that rival coffee shops. If you’re looking to improve your milk steaming skills, here’s my step-by-step guide for using the Breville Barista Express.

Understanding Your Equipment
The Breville Barista Express comes with a powerful steam wand that allows you to create café-quality milk texture. The 360-degree swivel feature of the steam wand gives you flexibility in positioning, which is essential for achieving the desired milk texture. Before you begin, make sure the machine is fully heated. Wait for the indicator light to confirm the machine is ready—steaming milk with an underheated machine leads to poor results.
Preparing the Milk
The type of milk you use significantly affects the foam's texture. For the richest, creamiest foam, whole milk works best due to its higher fat content. If you prefer a lighter foam, skim milk also froths well but produces a less creamy result. For those using plant-based alternatives, barista-specific versions of oat, soy, or almond milk tend to froth better than regular options.
Select a stainless steel milk jug, which conducts heat effectively. A 12-ounce jug is ideal for a single serving, while a larger one works for multiple servings. Fill the jug about one-third full with cold milk, up to the bottom of the spout. Using cold milk allows more time for steaming before it overheats.
Steaming the Milk
1. Purge the Steam Wand
Before steaming, turn on the steam briefly to purge any condensation from the wand. This ensures you’ll start with dry steam, which is essential for creating smooth foam. I learned that skipping this step often leads to watery milk.
2. Positioning the Steam Wand
Insert the steam wand’s tip just below the surface of the milk, near the jug's spout. Hold the jug at a slight angle to create a whirlpool motion, which helps to evenly distribute heat and break down larger bubbles.
3. Creating Microfoam
Turn the steam knob to full power. You’ll hear a hissing sound as the air incorporates into the milk. This stage, known as "stretching," introduces air for the first few seconds. Keep the tip just under the milk's surface, but avoid too much air intake—otherwise, you’ll end up with large bubbles instead of a velvety microfoam.
4. Texturing the Milk
After about 5-10 seconds, raise the jug slightly to submerge the steam wand deeper into the milk. This will heat the milk and continue the whirlpool effect, helping to create a smooth, silky texture. The goal is to achieve a glossy texture that resembles wet paint.
5. Monitoring Temperature
Use your hand to gauge the temperature—when the jug is too hot to touch for more than a few seconds, it’s time to stop steaming. Ideally, the milk should reach around 150°F (65°C). If you prefer precision, a thermometer can help you monitor the temperature more accurately. Avoid overheating, as milk scalds at 170°F (77°C) and will taste burnt.

6. Shutting Off the Steam
Turn off the steam before removing the wand from the milk to prevent splattering. Carefully take out the steam wand and set the jug aside.
Finishing Touches
Tap and Swirl
Gently tap the milk jug on the counter and swirl it. This removes any remaining large bubbles and creates a uniform, glossy texture. This simple step can make a significant difference in the final milk consistency.
Cleaning the Steam Wand
Immediately wipe the steam wand with a damp cloth to remove milk residue, then purge the wand again to clear out any milk trapped inside. Regular cleaning is essential for maintaining your machine's performance and preventing clogs.
Pouring the Milk
Tilt your cup slightly and pour the milk into the center of the espresso. Start pouring slowly from a higher angle to mix the milk with the espresso, then lower the jug and pour more quickly to allow the foam to settle on top. If you’re interested in latte art, experiment with pour speed and motion to create designs like hearts or leaves.
Tips and Tricks
Practice Makes Perfect
Don’t be discouraged if your first few attempts aren’t perfect. Steaming milk is a skill that improves with practice. Each type of milk requires a slightly different approach, so take time to experiment and learn how each one behaves.
Use Fresh Milk
Fresher milk froths better due to its higher protein content. Make sure to check the expiration date and use milk that hasn’t been open for too long.
Experiment with Plant-Based Milks
If you prefer plant-based milk, try using barista-style versions designed for frothing. Oat and almond milk, for instance, can produce great foam with the right technique.
Common Mistakes to Avoid
- Over-Aerating the Milk: Introducing too much air results in large bubbles instead of creamy microfoam. Keep the steam wand just below the surface to incorporate the right amount of air.
- Overheating the Milk: Milk scalds at 170°F (77°C), ruining its sweetness and texture. Use a thermometer or hand gauge to avoid overheating.
- Neglecting to Purge and Clean: Always purge the steam wand before and after use to prevent milk buildup, which can clog the wand and affect performance.

Conclusion
Steaming milk on the Breville Barista Express can transform your home coffee-making experience. With practice, you’ll be able to craft smooth, velvety microfoam that elevates your lattes and cappuccinos to coffee shop quality. Focus on your technique, experiment with different types of milk, and most importantly, enjoy the process. Soon enough, you’ll be creating café-worthy beverages in your own kitchen!
